
Email Campaign Sender v2.1.0
A fully automated cold email campaign tool that sends personalised outreach from your own Gmail account — not a shared server, not a bulk-mail API. Your domain, your reputation, your data. v2.1.0 delivers two full desktop GUI editions (Windows App v2.1.0 and Python GUI v2.1.0), Dark and Light themes, real-time statistics, skip-aware progress bar, colour-coded live terminal, and intelligent follow-up campaigns.
What's New in v2.1.0
v2.1.0 is a major release introducing the Windows App v2.1.0 and bringing the Python GUI v2.1.0 to all three major desktop platforms. Free upgrade for all existing customers — no reactivation needed.
You do not need to know a single line of Python to run either version. Both open with a double-click.
System Requirements — Windows App v2.1.0
| Requirement | Details | Notes |
|---|---|---|
| Operating System | Windows 10 or 11 (64-bit) | No admin rights required for install |
| Google Chrome | Any recent stable version | App detects and manages ChromeDriver automatically |
| Internet connection | Required for activation and sending | 48-hour offline grace period after activation |
| Python | Not required | No Python, no setup, no dependencies to install |
Getting Started — Windows App v2.1.0
- 1Complete your purchaseGo to rirazu.agency/email_campaign_sender and click Buy Now. You will be redirected to the download page immediately after payment.
- 2Download the Windows App installerOn the post-payment download page, click Download Windows App. The file is a standard Windows .exe installer.
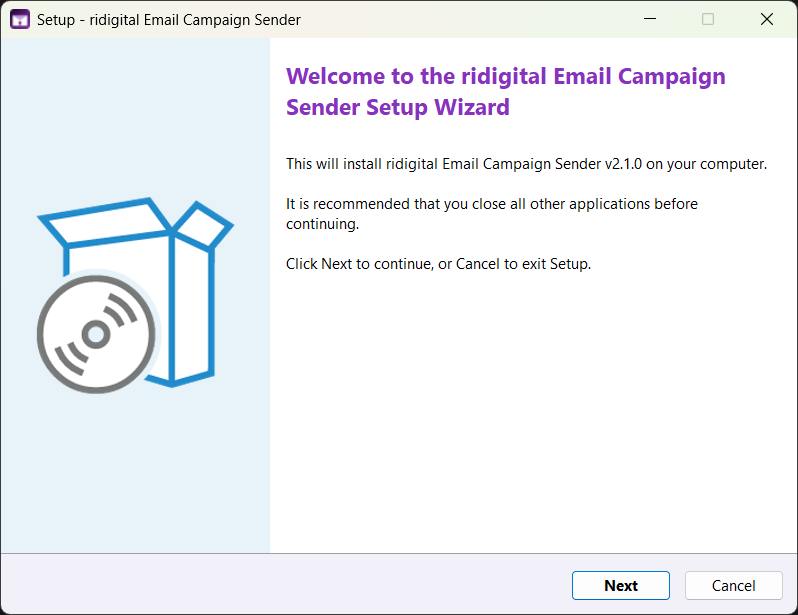
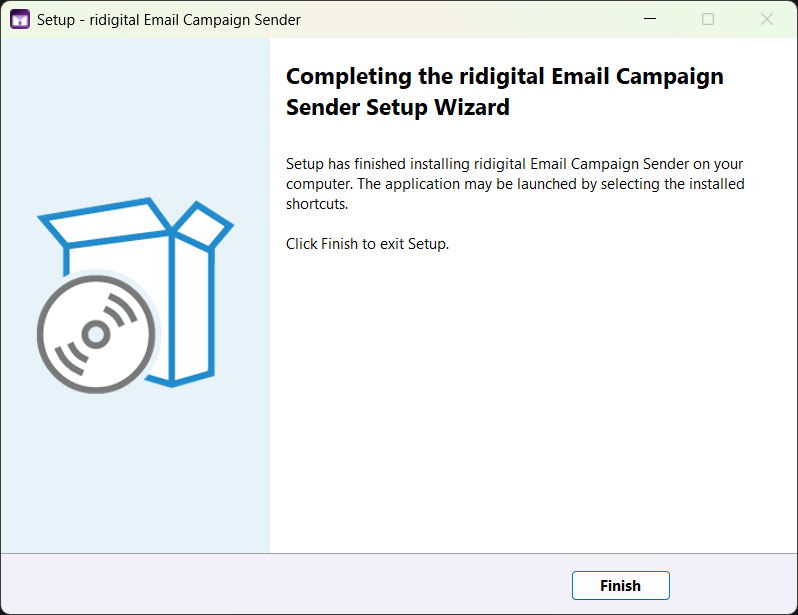
- 3Run the installerDouble-click the downloaded .exe file. Do not right-click "Run as administrator" — it is not needed. The setup wizard opens.
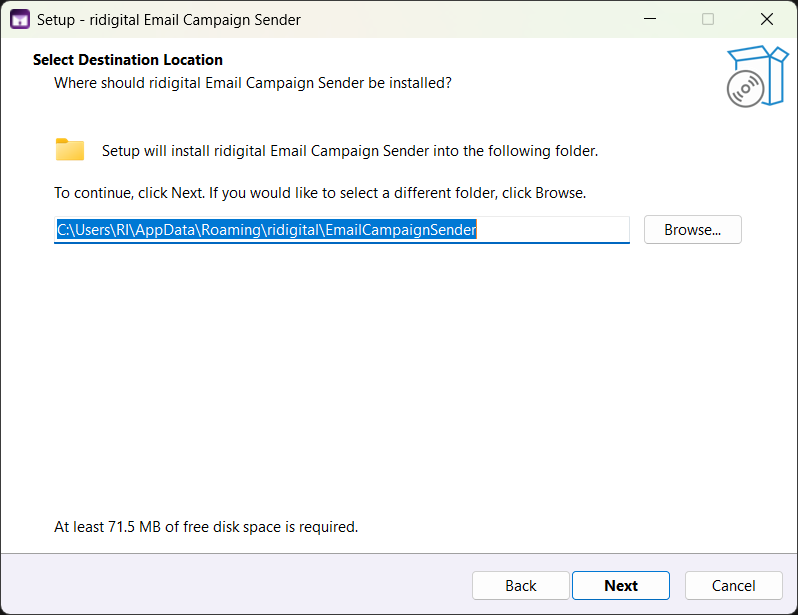
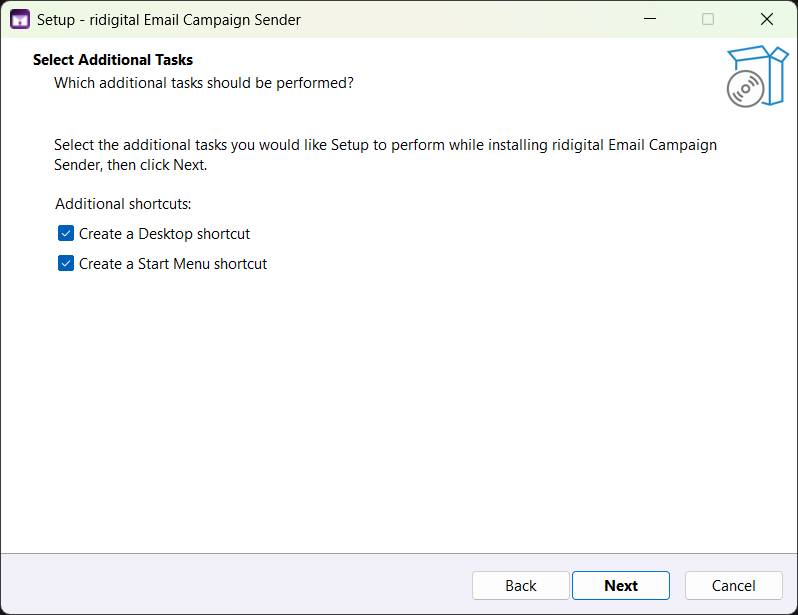
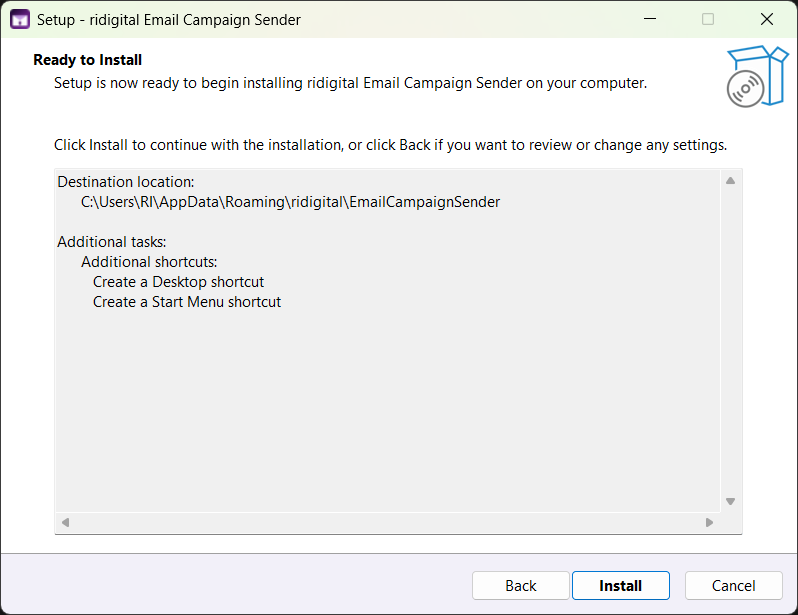
- 4Choose install location and complete setupAccept the default location or choose your own, click Install, then click Finish. A Desktop shortcut and Start Menu entry are created automatically.
- 5Launch from the Desktop shortcut — you're readyThe app is installed. Open it from your Desktop or Start Menu and proceed to activation below.
Installation walkthrough
First Launch & License Activation — Windows App v2.1.0
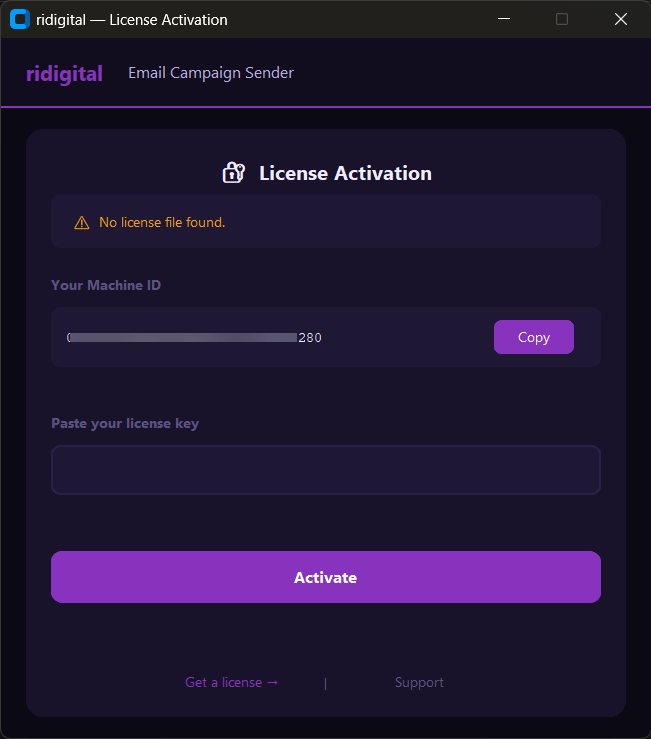
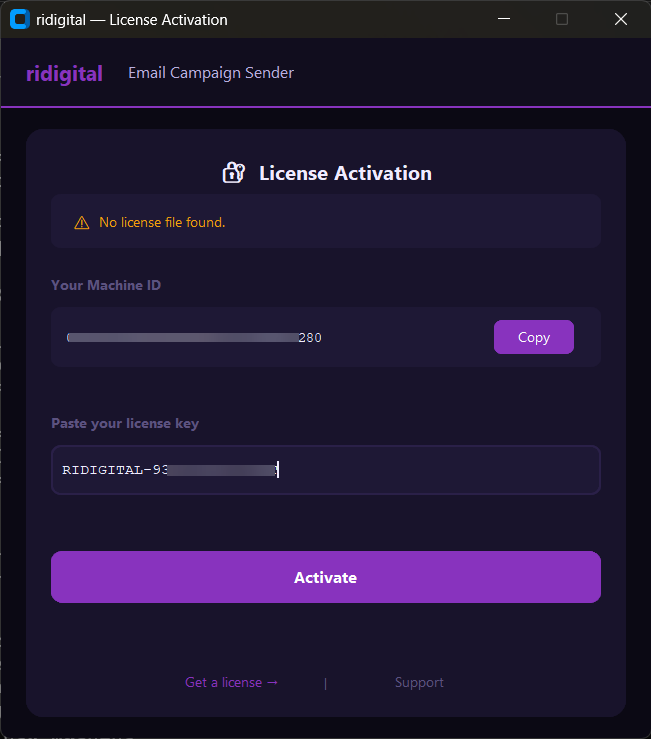
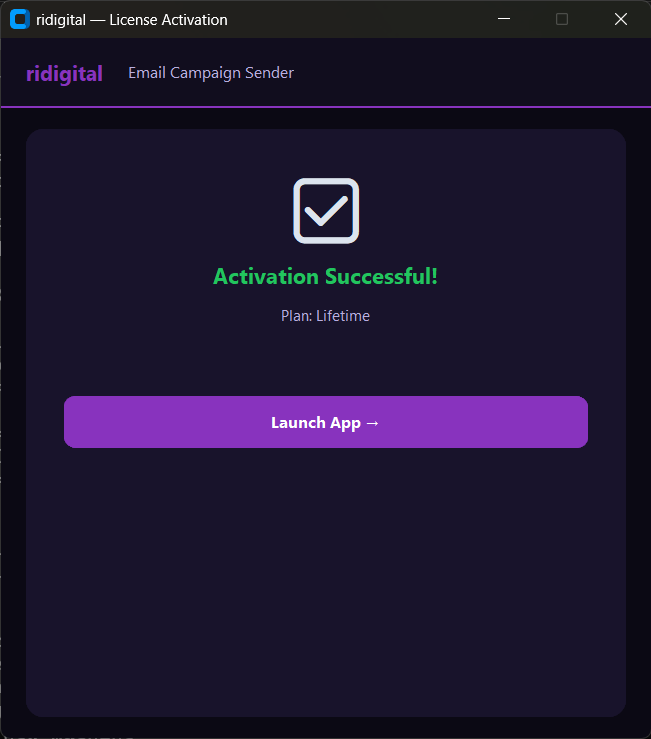
Identical on Windows App v2.1.0 and Python GUI v2.1.0
- 1Open the appLaunch from the Desktop shortcut or Start Menu. The activation screen opens automatically on first launch.
- 2Copy your Machine IDYour unique Machine ID is displayed on screen. Click the Copy button next to it.
- 3Visit the Activation pageGo to rirazu.agency/activate_email_campaign_sender. Enter your name, payment email, and paste your Machine ID.
- 4Click SubmitWe verify your purchase. Your license key arrives by email — usually within minutes. Check spam if it doesn't arrive within 30 minutes.
- 5Paste your license key into the appReturn to the app, paste the license key into the activation field, and click Activate.
- 6The app opens fully — you're ready to sendActivation is complete. Log in to Gmail when prompted and set up your first campaign.
System Requirements — Python GUI v2.1.0
| Requirement | Details | Notes |
|---|---|---|
| Python 3.8+ | Free from python.org/downloads | Windows: tick "Add Python to PATH" during install |
| Google Chrome | Latest stable version | App detects Chrome and manages ChromeDriver automatically |
| Internet connection | Required for activation and sending | 48-hour offline grace period after activation |
| Operating System | Windows 10/11, macOS (Intel + Apple Silicon M1/M2/M3), Linux | Both .py files must be in the same folder |
| Other packages | customtkinter, selenium, etc. | Install automatically on first launch — nothing to do manually |
Step 1 — Install Python 3.8+ (one time only)
Download Python from python.org/downloads — choose the latest 3.x release for your OS.
- 1Download the Python installerGo to python.org/downloads and click the yellow "Download Python 3.x.x" button for your OS.
- 2Windows: tick "Add Python to PATH" before installingThis checkbox is on the first installer screen. Tick it before clicking Install Now. Mac and Linux: no extra options needed.
- 3Click Install Now and wait for it to finishPython is installed. You only need to do this once. You will never need to use Python directly — just install it so the app can find it.
Download and run the .pkg installer from python.org/downloads. Click through Continue, Agree, Install — no special options needed. Works on both Intel and Apple Silicon (M1/M2/M3) Macs.
Optionally verify the install opened in Terminal:
Most Linux distributions already include Python 3. Check first:
If Python is not installed:
Step 2 — Install Google Chrome
Download and install Google Chrome from google.com/chrome if not already installed. The app detects your Chrome version and downloads the correct ChromeDriver automatically — you never need to do this manually.
Step 3 — Download and open the Python GUI
- 1Complete your purchaseGo to rirazu.agency/email_campaign_sender. You will be redirected to the download page immediately after payment.
- 2Download the Python GUI ZIPClick Download Python GUI on the post-payment page. The ZIP contains two .py files (Dark and Light theme) and a setup guide.
- 3Extract the ZIP — keep both files in the same folderExtract to any folder you like. Keep both .py files together in the same folder — this is required for the theme toggle to work.
- 4Double-click the Dark or Light theme file to openDouble-click ridigital_Email_Campaign_Sender_v2_1_0_GUI_Dark.py (or the _Light version). On first launch, all required packages install automatically in the background — wait about 30 seconds.
- 5The GUI opens — you're ready to activateThe full desktop GUI opens. The activation screen appears automatically on first launch.
On some systems the .py file opens in a text editor instead of running. This is a one-time fix — once Python is set up correctly, future double-clicks will work.
python3 ridigital_Email_Campaign_Sender_v2_1_0_GUI_Dark.py
python3 ridigital_Email_Campaign_Sender_v2_1_0_GUI_Dark.py
A full guide is also included in your ZIP — open Install_Python_First.html in any browser for step-by-step instructions with screenshots.
First Launch & License Activation — Python GUI v2.1.0
Identical on Windows App v2.1.0 and Python GUI v2.1.0
- 1The activation screen opens automaticallyOn first launch, the app shows the activation screen. Your Machine ID is displayed — click Copy next to it.
- 2Visit the Activation pageGo to rirazu.agency/activate_email_campaign_sender. Enter your name, payment email, and paste your Machine ID.
- 3Click SubmitWe verify your purchase. Your license key arrives by email within minutes. Check spam if it doesn't arrive within 30 minutes.
- 4Paste your license key into the appReturn to the app, paste the license key into the activation dialog, and click Activate.
- 5The app opens fully — you're ready to sendActivation complete. Log in to Gmail when prompted and set up your first campaign.
How to Use the Contact CSV
- 1Click Browse to pick your CSVChoose a CSV file from anywhere on your computer. It is copied to the app's contacts folder automatically.
- 2Use the folder icon 📁 to open the contacts folder directlyClick the folder icon next to the Contact CSV row to open the exact managed folder in File Explorer (Windows) or Finder (Mac).
- 3Use the refresh button ↻ after dropping files in manuallyIf you copy files directly into the folder, click refresh to reload the file list.
How to Use Email Templates
- 1Use the built-in Composer to create templates visuallyClick Compose in the app header to open the built-in Email Composer. Design HTML emails with no coding — live preview updates as you type. Export directly as a .json template file.
- 2Or click Browse to load any .json template from anywhereThe file is copied to the app's templates folder automatically. Use the 📁 folder icon to open the templates folder directly.
What to Do if Chrome is Missing
The app detects Chrome automatically on launch. If Chrome is not installed, a branded popup appears with a direct Download Chrome button. Install Chrome and try starting the campaign again — no other action needed.
v2.1.0 opens as a desktop application window. All campaign controls are in the left panel; all live monitoring is on the right.
Left Panel — Settings
| Control | What it does | Tooltip ⓘ |
|---|---|---|
| Campaign Type | New Campaign (fresh CSV) or Follow-up (reply into existing threads) | Hover for explanation |
| Send Speed | Slow / Medium / Fast — controls human-like delay between sends | Shows delay ranges |
| Daily Limit | Max emails to send today; resets at midnight. Tool stops and saves when reached. | Gmail recommendations |
| Session Limit | Max emails in this single run. Useful for splitting large CSV lists across sessions. | Explains session vs daily |
| Signature | On = keep your Gmail signature; Off = template content only | Shows effect |
| ▶ Start Campaign | Validates all settings, opens Chrome, begins the campaign | — |
| ⏹ Stop Now | Halts after current send completes. Progress is saved — resume by starting again. | — |
Right Panel — Live Monitoring
| Component | What it shows | Update rate |
|---|---|---|
| Session Sent green | Emails sent in the current run | 400 ms |
| Failed red | Sends that encountered an error this session | 400 ms |
| Today amber | Total sent today across all sessions | 400 ms |
| All-Time Total purple | Lifetime send count from all campaigns ever run | Every 5 s |
| Progress Bar | Contacts processed ÷ total as %. Skip-aware. | 400 ms |
| Live Terminal | Green = sent, Red = error, Amber = warning, Purple = status. | Real-time |
Click the sun/moon icon in the top-right of the app header to switch between Dark and Light themes instantly — no restart needed. The preference is saved for next launch.
Campaign Actions
| Option | What it does | Notes |
|---|---|---|
| New Campaign | Select CSV + Template, click ▶ Start Campaign | Set speed, limits first |
| Follow-Up Campaign | Switch type to Follow-up, select progress file + template | Requires v2.1.0 primary campaign |
| Resume Campaign | Select same files, click Start — tool auto-skips sent contacts | Progress bar starts at correct % |
| Compose Template | Use built-in Composer or edit JSON templates directly | Supports {Token} personalisation |
| Switch Theme | Click the sun/moon icon in the app header — instant switch between Dark and Light | Python GUI: both .py files must be in the same folder |
Speed Profiles
| Profile | Delay | Auto-Pause | Best For |
|---|---|---|---|
| Slow | 30–60 s | Every 20 emails (3–5 min) | New accounts, cold outreach |
| Medium Recommended | 15–30 s | Every 25 emails (2–3 min) | Most campaigns — balanced |
| Fast | 8–15 s | Every 30 emails (60–120 s) | Warm leads, established accounts |
| Custom | You set min/max | Configurable | Advanced users |
Daily Limits
| Option | Emails/Day | Account Age | Notes |
|---|---|---|---|
| Conservative | 200 | New <2 weeks | Safest starting point |
| Standard Recommended | 500 | 2–4 weeks | Good volume-to-safety balance |
| Aggressive | 1,000 | 1+ month | Requires good sender history |
| Maximum | 2,000 | 3+ months | Gmail Workspace daily cap |
After activation, the app opens a dedicated Chrome window for your campaigns — separate from your regular Chrome. Log in once, and the session is saved for all future runs.
- 1Click "Connect Gmail" in the appA new dedicated Chrome window launches automatically and navigates to mail.google.com.
- 2Log in and wait for inbox to loadEnter your credentials and complete 2FA if enabled. Wait until your inbox is fully loaded.
- 3Return to the app — it detects the session automaticallyThe app confirms the connection and the session is saved. Future launches skip this step entirely.
If you have multiple email addresses in Gmail — personal @gmail.com, a cPanel business email, or a Workspace account — you must set the right one as default. This is the address your campaign emails will be sent from.
- 1Open Gmail SettingsIn Gmail, click the gear icon top-right → "See all settings".
- 2Go to "Accounts and Import" tabClick the "Accounts and Import" tab at the top of Settings.
- 3Find "Send mail as:" section and click "make default"Scroll to see all email addresses. Click "make default" next to the address for your campaigns.
Your contact list must be a .csv file. The email column is required. All other columns are optional but strongly recommended for personalisation.
[email protected],Jane,Acme Corp,SaaS,Great case study candidate
[email protected],Bob,Tech Ltd,E-commerce,Met at DevConf 2024
Encoding: Save as UTF-8 CSV. Excel: File → Save As → CSV UTF-8. Google Sheets: File → Download → CSV.
Click Compose in the app header to open the built-in visual Email Composer — no separate file, no internet required. Design HTML emails with a live preview that updates as you type. Templates export as .json files and are loaded by the app automatically at campaign time.
- 1Click Compose in the app headerThe Composer opens. Your loaded CSV's column headers are detected automatically so you can insert tokens.
- 2Write subject and body with tokensExample subject: Quick question about {Company}, {First_Name}
- 3Preview and save the templateThe live preview updates as you type, using real contacts from your CSV. Click "Save Template" — the .json file is saved to the templates folder, ready for campaigns.
Hi {First_Name},
I came across {Company} and noticed you're in the {Industry} space.
{Custom_Note}
Would love 15 minutes to explore if there's a fit.
- →Personalise every email with real dataUse {First_Name}, {Company}, and a unique {Icebreaker} per contact. Mass-identical emails trigger spam filters.
- →Write like a human, not a marketerShort sentences. Plain language. Conversational tone. No exclamation marks, no ALL CAPS.
- →Warm up new accounts graduallyStart at 50/day week 1, 100/day week 2, increase by 100–200/week until you hit your target volume.
Best-performing subject lines: short (3–7 words), personal, conversational. Examples: Quick question, {First_Name} · Thoughts on {Company}? · Re: your work at {Company}
Choose settings that match your account's sending history. New accounts must always start conservative to protect their reputation.
| Profile | Delay | Auto-Pause | Best For |
|---|---|---|---|
| Fast | 5–15 s | Every 30 emails (60–120 s) | Warm leads, established accounts |
| Medium Recommended | 15–30 s | Every 25 emails (2–3 min) | Most campaigns — balanced |
| Slow | 30–60 s | Every 20 emails (3–5 min) | New accounts, cold outreach |
| Daily Limit | Emails/Day | Account Age |
|---|---|---|
| Conservative | 200 | New <2 weeks |
| Standard Recommended | 500 | 2–4 weeks |
| Aggressive | 1,000 | 1+ month |
| Maximum | 2,000 | 3+ months (Workspace) |
| Option | What Happens | Best For |
|---|---|---|
| Remove Signature (default) | Clears everything with Ctrl+A, types email body from scratch. No signature appears. | Cold outreach — clean plain-text feel |
| Keep Signature | Preserves your default Gmail signature. Types body above it with one blank line. | Warm campaigns where branding matters |
- ✓Runs 100% on your computerNo data leaves your machine except to Google's servers (email sending) and our license server (validation). Your contacts and content never reach us.
- ✓No password storageThe app never reads or stores your Gmail password. It uses Chrome's own session — the same as a normal browser login.
- ✓Chrome profile stays localSession saved only in ridigital_campaign_sender/chrome_profile/. Delete anytime to clear.
Account Health Metrics
| Metric | Safe Zone | Danger Zone |
|---|---|---|
| Bounce rate | Below 2% | Above 5% — pause immediately |
| Spam complaint rate | Below 0.1% | Above 0.3% — serious risk |
| Daily volume | Start at 200, grow weekly | Jumping to 2,000 on day 1 |
| Sending hours | Business hours (9am–6pm) | Midnight batch sends |
After a primary campaign, send a follow-up that appears as a reply in the original email thread. The app checks each thread for recipient replies and skips anyone who already responded.
- 1Wait 3–5 business days after primary campaignGive recipients time to respond before following up.
- 2Select Follow-Up Campaign typeChoose the primary campaign to follow up on from the list shown.
- 3Select or compose your follow-up templateKeep it short — 2–3 sentences. The recipient can see the original email above it in the thread.
- 4Set speed and limits, then startSame settings as a primary campaign. Resumable and progress-saved.
Just following up on my email from last week —
did you get a chance to take a look?
Happy to answer any questions.
The best-written campaign can underperform simply because it arrived at the wrong time. Time zones, local working hours, and cultural habits all affect whether your email is the first thing they see or buried under a full inbox.
| Region | Best Days | Best Time (Local) | Avoid |
|---|---|---|---|
| North America | Tue, Wed, Thu | 9:00–11:00am, 1:00–3:00pm | Mon morning, Fri afternoon |
| UK & Europe | Tue, Wed, Thu | 8:00–10:00am, 2:00–4:00pm | Friday, public holidays |
| South Asia | Mon–Thu | 10:00am–12:00pm, 3:00–5:00pm | Friday afternoons (some regions) |
| East Asia | Tue, Wed, Thu | 9:00–11:00am | Mon morning, Fri, national holidays |
| Middle East | Sun–Thu | 9:00–11:00am | Fri–Sat (weekend in many countries) |
| Australia | Tue, Wed, Thu | 9:00–11:00am AEST | Monday morning, Friday |
Live Interactive Demo
The full v2.1.0 interface running live in your browser — click any setting, watch the terminal, switch themes. No install or signup required.
Click any control to interact ·
License & Activation Details
Troubleshooting
| Issue | Likely Cause | Fix |
|---|---|---|
| ChromeDriver version mismatch | Chrome updated since last run | Update Chrome at chrome://settings/help and re-run. Script auto-downloads matching driver. |
| License not found / invalid | App not yet activated, or network issue during validation | Open the app — the activation screen will appear. Paste your license key and click Activate. If you have already activated, check your internet connection (48-hour offline grace period applies). |
| Sending from wrong account | Wrong Gmail in Chrome profile | Delete ridigital_campaign_sender/chrome_profile/ and re-run. Sign in with the correct account and set it as default in Gmail settings. |
| Emails landing in spam | High volume on new account, or poor list quality | Reduce daily limit. Use Slow speed. Improve personalisation. Check SPF/DKIM on custom domains. |
| Campaign stops mid-run | Internet disconnection or computer sleep | Click Resume Campaign in the app — it picks up exactly where it stopped. Check power settings to prevent sleep during campaigns. |
| Follow-up not detecting replies | Primary campaign run with v1.1.0 | Re-run primary campaign with v2.1.0 to generate thread IDs. v1.1.0 primaries don't support follow-up. |
| CSV tokens not replaced | Token name mismatch or wrong syntax | Token must exactly match CSV header — case-sensitive. Use {Column_Name} with single curly braces, no spaces inside. |
| ModuleNotFoundError | Auto-install failed (network issue) | Run: pip install selenium pyperclip webdriver-manager undetected-chromedriver requests then retry. |
| Offline error after 48h | Exceeded offline grace period | Connect to internet briefly. Script validates and resets the 48-hour timer. |
Frequently Asked Questions
Windows App v2.1.0: No Python required at all. Download, double-click to install, done — exactly like any commercial software.
Python GUI v2.1.0: Python 3.8+ must be installed first — it is a free, one-click download from python.org and takes under a minute. After that, double-click the app file and everything else installs itself in the background. You never write a single line of code or touch a terminal.
For the Python GUI v2.1.0, both theme files must be in the same folder for the toggle to work. The app automatically finds the sibling file — it searches for a .py file containing "dark" or "light" in the filename. No re-activation needed when switching.
Changelog
| Version | Release | Changes |
|---|---|---|
| v2.1.0Latest | May 2026 | Windows App v2.1.0 & Python GUI v2.1.0 — Major Release. Windows App v2.1.0: one-click installer for Windows 10/11, no Python required. Python GUI v2.1.0: Windows, macOS (Intel + Apple Silicon M1/M2/M3), Linux. Both editions: full desktop GUI with Dark & Light themes, GUI license activation (paste key in-app), built-in Email Composer with live preview, one-click theme toggle (sun/moon icon), Open Folder buttons on file rows, Chrome auto-detection popup, scrollable window layout, real-time 4-tile statistics dashboard, skip-aware progress bar, colour-coded live terminal, and intelligent follow-up campaigns. Free upgrade for all existing customers — no reactivation needed. |
| v1.2 | Early 2026 | Intelligent Follow-Up Campaigns — threaded replies inside original conversations, auto-detects and skips replied contacts, reply detection engine, thread ID logging. Improved ChromeDriver management. Enhanced error handling. Revised statistics dashboard. |
| v1.1.0 | 2025 | Campaign resume with zero duplicate sends. Statistics dashboard (session, daily, all-time). Custom speed profiles. Visual HTML email Composer. Multiple CSV encoding support. 48-hour offline grace period. Signature keep/remove option. |
| v1.0.0 | 2024 | Initial release. Core Gmail-based campaign sending. CSV personalisation with {{token}} syntax. Machine-locked license system. Auto-dependency installer. Human-like sending delays and daily volume limits. |
Contact Support
Can't find what you need? Fill in the form below. For machine transfers, include your original purchase email and new Machine ID.